User Guide

Find answers and learn how to get the most from Subnet Calc.

Playground

The playground lets you quickly design a subnet, and helps students understand how subnets work. It persists your design in browser local storage, but this should not be treated as reliable — your design can be lost if you clear your browser storage or switch browsers. If you want to retain a design, log in and sign up for one of the paid plans.

Tour of features:

  1. Open the playground page and enter a CIDR block. For this example, choose an IP address of 10.0.0.0 with a prefix length of 16.
  2. Use the split icon at the right of the row to split a subnet into two separate subnets.
  3. Click the edit purpose icon in one of the purpose cells and enter a purpose for the subnet.
  4. Click View Settings to add, remove, or reorder the columns that are displayed in the table.
  5. Click the rejoin button at the end of a row and note how the two subnets are joined back together.
  6. Navigate away to another website, then return to the playground and confirm that your previous design was retained.

Playground with the CIDR block 10.0.0.0/16 entered and the split and join buttons highlighted.
The split and join buttons, highlighted at the right of the subnet row.

Many users will want a more reliable way to store and manage their organisation's subnets. Signing up for a paid plan unlocks the projects system, which provides reliable storage and design versioning.


Projects and hierarchy

Projects are named, hierarchical workspaces for managing subnets that help you organise and manage large address spaces.

Projects have the following features:

  • A project is locked by a single user for editing.
  • A leaf subnet can be converted into a child project and managed independently of the parent project.
  • Projects can be hosted in a different region from their parent projects.
  • The full version history for all projects is stored.
  • You can link or unlink projects from the projects page, providing the CIDRs are compatible.
Projects page showing a parent project with two child projects.
The projects page showing a project hierarchy.

The designer on the projects page works like the designer on the playground page, but you must obtain a lock before you can edit a project. The Edit button is located in the button bar at the top of the project, next to the IP address and prefix length fields.

Project designer with the Edit button in the button bar.
Click Edit to acquire the lock and start editing.

Once you are editing, your uncommitted changes are periodically saved, so you can move to a different machine and pick up where you left off.

The lock you acquire is attached to your user account and persists between browser sessions. You must explicitly release the lock by clicking either Save to save your changes or Cancel Edit to discard your changes.

If a user has locked the project and is unavailable, it is possible to steal the lock. However, this is discouraged, as it could lead to the user holding the lock being unable to save their changes.

Steal lock option shown when another user holds the project lock.
Stealing a lock is possible but discouraged.

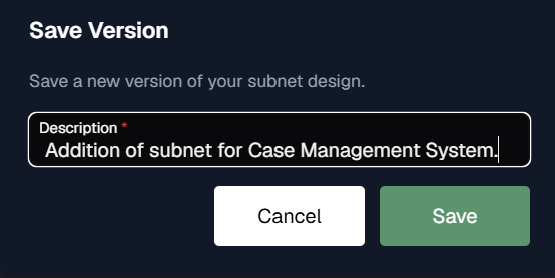
You are asked to describe your changes when you save the subnet.

Save changes dialog asking for a description of the changes.
Describe your changes when saving.

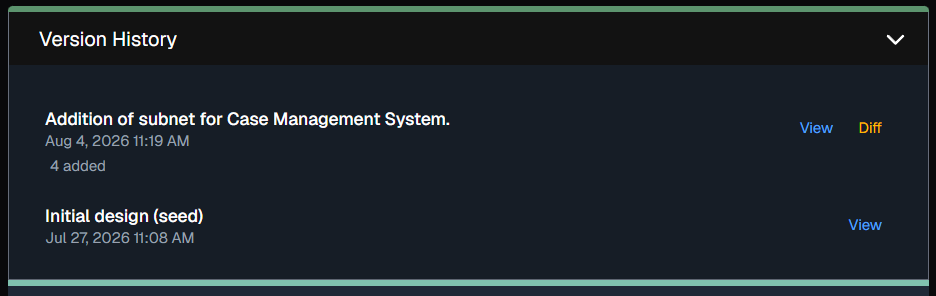
These descriptions are reported in the version history.

Version history list showing saved versions with their descriptions.
The version history records each saved change.

You can choose to either view a previous version or see a simple diff that shows you what changed between versions.

Diff view showing what changed between two versions of a project.
A simple diff between two versions.

Teams, invites, and members

Teams are managed through the Account >> Profile menu.

Profile page showing user details and the team panel with its members.
Teams are managed from the profile page.

Teams equate to tenants in the system and allow groups of users to work on the same projects. Each team starts out in the free tier, which does not allow you to create projects or invite other team members — both features are unlocked by upgrading to a paid tier.

Each user can only have one free team, so the Add Team button disappears if you are currently associated with a free team.

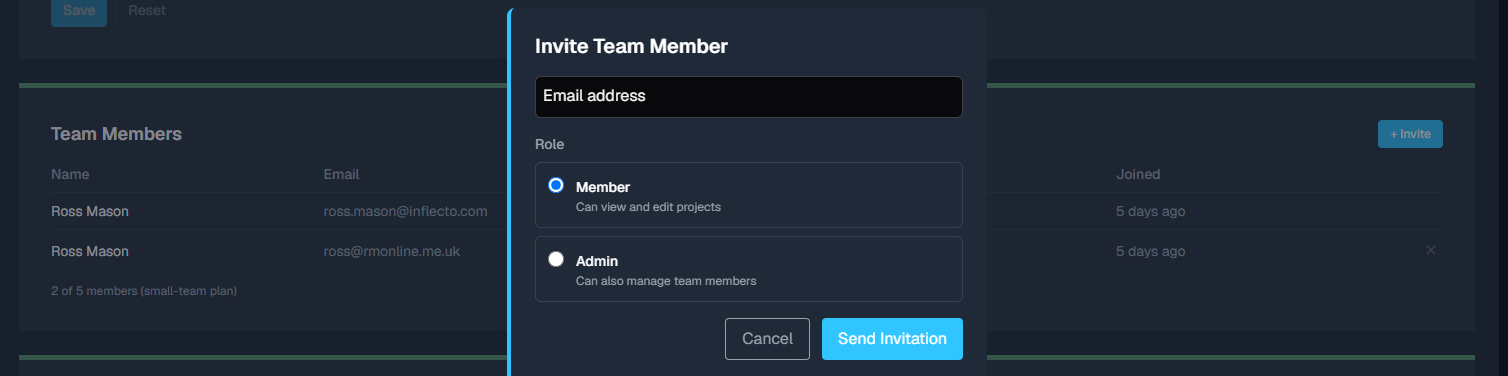
Team members are invited via the Team Members table by clicking the Invite button and supplying an email address.

Invite team member dialog with email address and role fields.
Invite a new team member by email.

Team members can be given the role of Member or Admin. The Admin role allows the invited user to also manage team members and the project data location settings.

The invite process emails the invitee; if they accept the email invite, they become a member of the team with the selected role.

Export templates

Export templates let you turn a project's subnet design into a CSV, JSON, XML, text, or Terraform file. Templates are reusable, so you can keep the same output format across projects.

Open Export Templates from the main navigation to create or edit a template. Enter a name, choose the file extension, and write the text that should appear before and after the exported rows. The Row Template is repeated for each exported subnet, and the Row Separator is inserted between rows.

A template must contain at least one placeholder in its Row Template. Placeholders are case-sensitive and must use the exact names below:

PlaceholderValue
{{CIDR}}The subnet in CIDR notation.
{{Hosts}}The number of usable host addresses.
{{Purpose}}The purpose assigned to the subnet, if one has been set.
{{NetworkRange}}The first and last addresses in the subnet.
{{Addresses}}The total number of addresses in the subnet.
{{BroadcastAddress}}The broadcast address. This is empty for IPv6.
{{NetworkAddress}}The network address.

Exports include only leaf subnets. A leaf is a subnet that has not been divided into child subnets. Parent subnets that have been split are omitted because their address space has already been divided; an unsplit subnet is itself a leaf and is included.

  1. Open the Projects page and select the project you want to export.
  2. Click Export in the project actions.
  3. Choose an available template. Templates provided by SubnetCalc are marked in the list, alongside your team's templates.
  4. Review the template preview and click Download.

The project must have a committed design version before it can be exported. If no templates are available, use Create a template in the export dialog to open the template editor.

Subscriptions, billing, and plans

Choose the plan that fits your team. Your subscription is managed from the Subscriptions area on the Profile page, where you can upgrade, manage payment details, and cancel.

PlanUsersProjectsBilling
Free1NoneNone
Individual15Annual
Small Team515Annual
Midsize Team1550Annual
Large Team50250Annual
  • All subscriptions are annual and billing is handled through Stripe.
  • The base currency for all plans is USD, but the Stripe checkout process allows you to check out in your local currency if you wish.
  • You can cancel your subscription from the Subscriptions area on the Profile page, and you can downgrade to a lower plan — subject to meeting the project and team member requirements — using the pricing page.

Regions and data residency

Each project is stored in a single region. It makes sense to pick the region closest to your users for lower latency. Project hierarchies can span regions to support global teams.

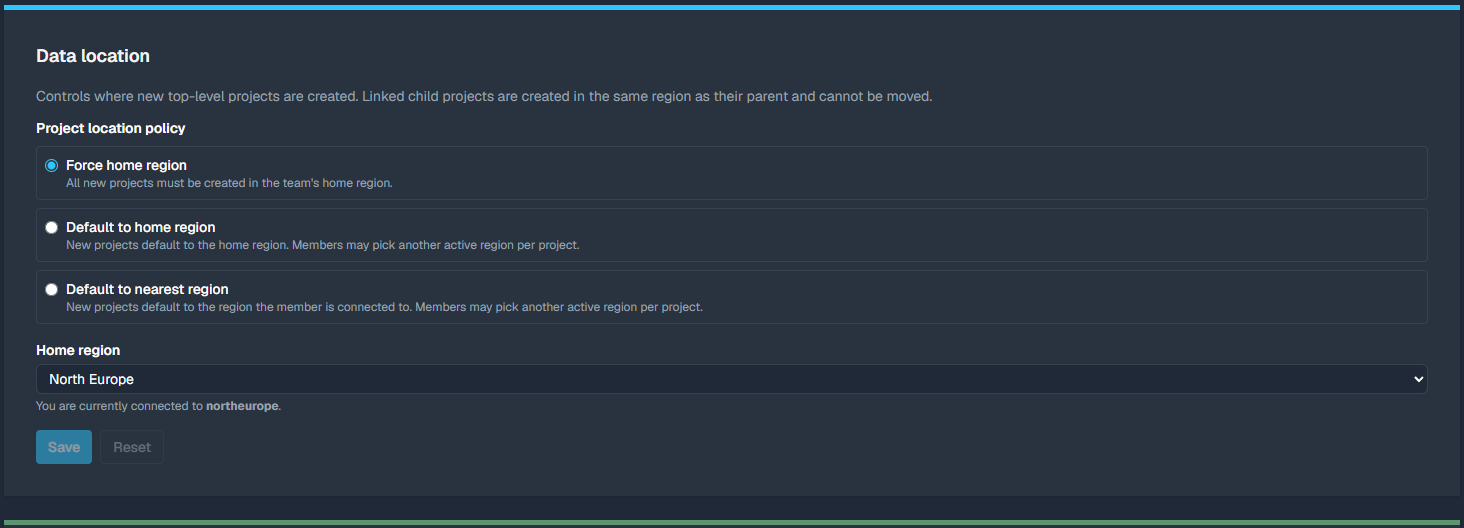
Admin users can configure the region policy for their team, including both the home region and the project location policy:

  • Force home region — all new projects must be created in the team's home region.
  • Default to home region — new projects default to the home region; members may pick another active region per project.
  • Default to nearest region — new projects default to the region the member is connected to; members may pick another active region per project.
Data location settings showing the home region and project location policy options.
Region policy settings for a team.

Note: some data is always replicated globally, including user data and basic project data. Further details are on the data residency page.

Account and profile management

  • You can log in using a Microsoft, Google, or Apple account. User accounts are based on email addresses, so you can mix and match providers as long as your email address is the same at each provider.
  • Switching teams and setting a default team can be done on the profile page.
  • Additionally, team managers can change the team name on the profile page.
Profile page showing user details, the team switcher, and the team name.
The profile page with team switching and team details.